In the fast-paced world of digital marketing, efficiency is everything. When working with Google Tag Manager (GTM), setting up accurate triggers can make or break your tracking strategy. While it might seem straightforward to rely on visible elements like URLs or button text, there’s a catch—what you see isn’t always what Google sees. Misalignments here can lead to errors, wasted time, and unnecessary rework.
In this post, we’ll explore a foolproof method to set up GTM triggers with precision, saving you countless hours and ensuring your tags fire exactly as intended.
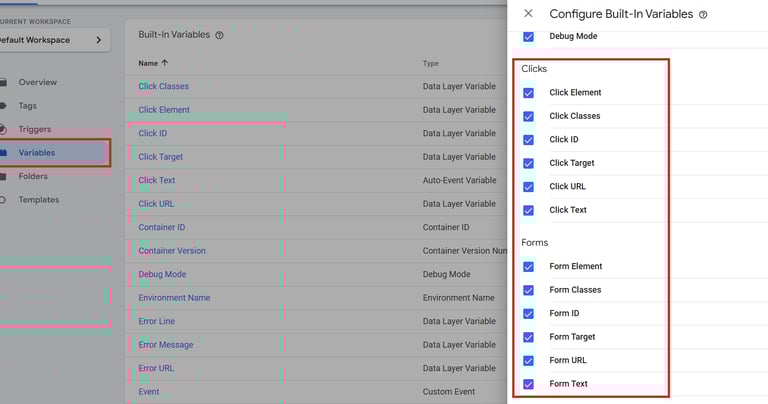
Step 1: Select All Possible Variables
The first step in ensuring accurate triggers is selecting all possible variables in Google Tag Manager (GTM). Without selecting these, you won’t be able to see how GTM interprets elements on your site.
This is a critical step because GTM doesn’t automatically display all the available data points unless you explicitly enable them. By enabling all relevant variables, you can observe exactly how GTM processes your webpage elements, such as button clicks, page views, and form submissions.
As shown in the image below, selecting variables ensures you’re not working in the dark.

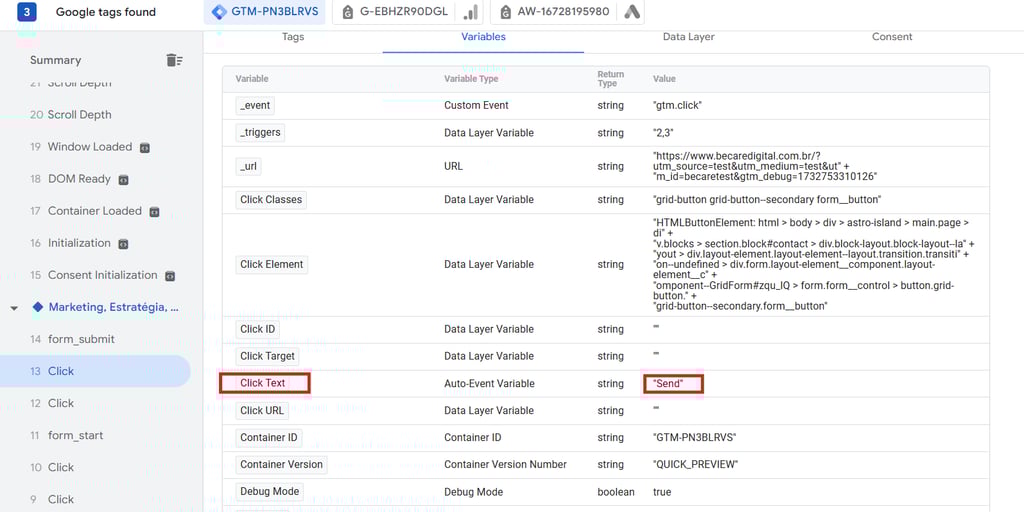
Step 2: Use Preview Mode to Inspect Variables
Once you’ve selected the variables, the next step is to test your setup using Preview Mode in GTM. This allows you to simulate interactions on your website and see how GTM captures data in real-time.
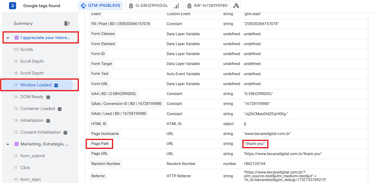
For example, when you click a button on your site, GTM records the event in Preview Mode. In the Variables tab, you’ll see dynamic details like:
Click Text: Displays the visible text on the button.
Page Path: Shows the URL path of the page where the action occurs.
In the example below, when you hit the "Send" button, the Click Text is displayed as “send.” This is what GTM uses to determine when the button is clicked.
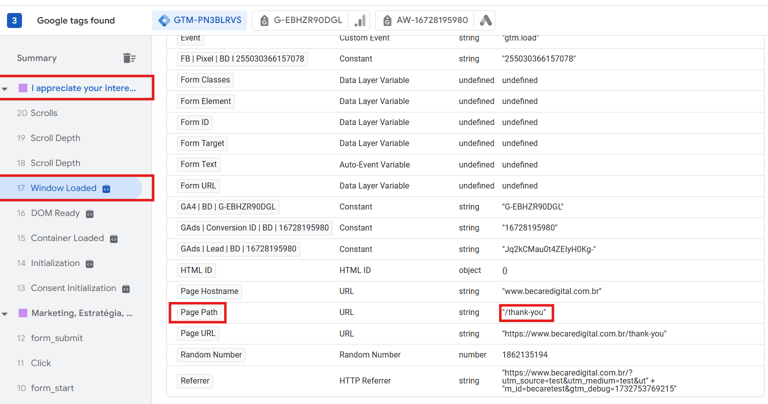
Additionally, you can track the entire user journey. For instance:
When a lead reaches the thank-you page after submitting a form, GTM can detect the Page Path (e.g., /thank-you).
This insight ensures your tags are firing at the right moments, like form submissions or conversions.
The image below demonstrates how GTM captures this information in real-time.
Step 3: Set Up a Trigger Based on Insights
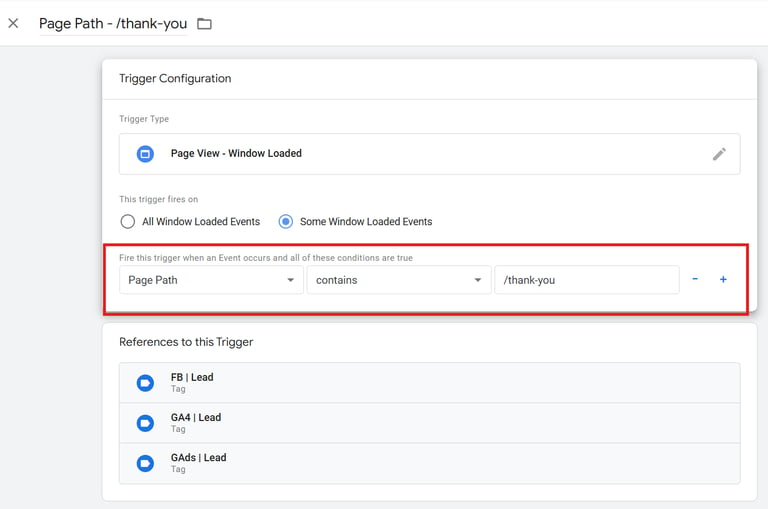
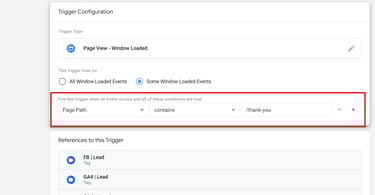
With the information gathered from the first two steps, you can now set up an accurate trigger. This trigger ensures your tags fire only under the specified conditions.
For instance:
Match the Page Path variable (/thank-you) to ensure the tag fires when the user lands on the thank-you page.
By leveraging this data, you align GTM’s triggers with the actual behavior on your site. This reduces the chances of missed or duplicate events and ensures data accuracy.
The image below provides an example of a properly configured trigger using these insights.
Conclusion
By following these steps—selecting all variables, inspecting them in Preview Mode, and setting up triggers with precise data—you can significantly reduce errors in your GTM implementation.
This approach ensures your triggers are based on how GTM actually sees your site, not just what’s visible to the naked eye. The result? Fewer tracking issues, more accurate data, and hours saved from rework.
Get in touch
+55 19 9 9751 7261
mcc@becaredigital.com.br
Business Registration Number
57.243.830/0001-67


Safe Site